
How is a Stretch Ceiling Sky Installed?
Struggling to create that perfect, awe-inspiring ceiling? Installing a printed sky effect can feel risky, with fears of pixelated images, uneven lighting, and costly installation errors haunting your project. A flawed result not only disappoints the client but also damages your reputation and budget with rework. The key to a flawless stretch ceiling sky is understanding that it's an integrated system, not just a picture, requiring careful planning from artwork to final tensioning.
A stretch ceiling sky is installed by first fixing aluminum profiles to the designated perimeter, preparing a diffuse LED backlighting system, and then heating and tensioning a custom-printed PVC membrane1. This membrane, which has a welded "PVC harpoon" edge2, is skillfully tucked into the profile tracks until it becomes perfectly smooth and taut, revealing the seamless sky image.
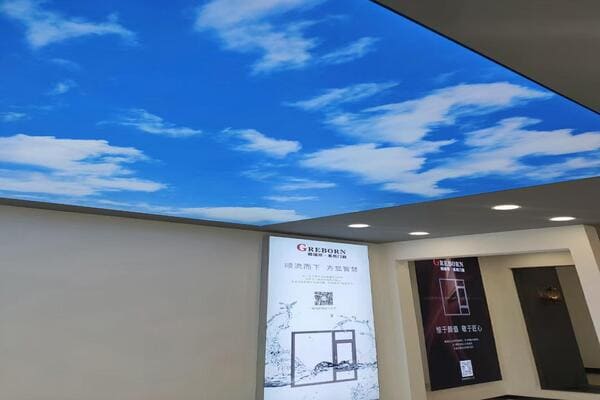
Achieving this stunning, realistic effect goes far beyond simply hanging a printed sheet. The final quality depends on a series of critical steps that happen long before the installation team arrives on site. Let's explore the complete process that professional installers and contractors follow to deliver a perfect result every time.
What Is the Pre-Installation Process for a Stretch Ceiling Sky?
You've secured the project, and the client is excited about their new sky ceiling. Rushing into the installation without a thorough preparation phase is a recipe for disaster. What if the printed image turns out blurry, the colors are off, or the membrane doesn't fit the frame?
The pre-installation process is a critical quality gate. It involves selecting the right membrane material, finalizing the high-resolution sky artwork through digital proofs, and choosing the correct aluminum profiles based on the specific structure of the installation site.
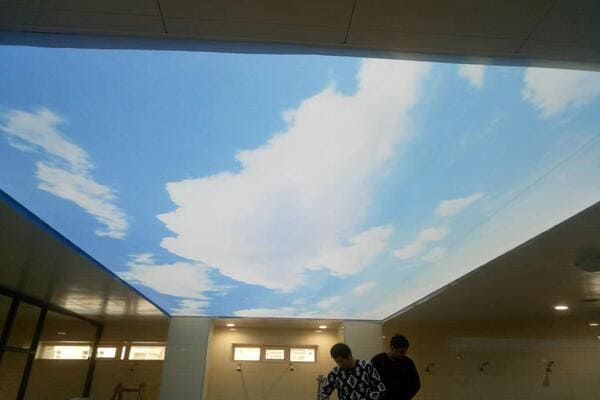
Dive Deeper: Planning for a Perfect Finish
As a manufacturer, we've seen firsthand how proper planning at this stage prevents the most common and costly installation failures. A successful stretch ceiling sky project is built on a foundation of careful material selection and precise design confirmation.
H3: Choosing the Right Membrane Material
The "sky" itself is a high-quality image UV-printed onto a PVC stretch ceiling film. The choice of film can impact the final look and feel. The two most common options we supply are:
- 0.25mm Film: This is our premium recommendation for printed sky ceilings. Its increased thickness provides a better hand-feel, a richer texture, and enhanced durability3. It feels more substantial during installation and contributes to a high-end finish.
- 0.18mm Film: A widely used and reliable standard, this film offers excellent performance and is a cost-effective solution for many commercial and residential projects. It still produces a beautiful, vibrant sky effect when installed correctly.
We typically consult with our clients—installers and contractors—to determine the best option based on the project's budget, scale, and desired quality level.
H3: The Non-Negotiable Step: Artwork Confirmation
This is arguably the most important step in the pre-installation phase. A low-resolution image that looks fine on a computer monitor can become a pixelated, "mosaic" mess4 when stretched across a large ceiling. To prevent this, we follow a strict proofing process:
- Image Selection: The client chooses a sky design, either from our library or by providing their own.
- Resolution Check: We verify that the image file (preferably a vector file or high-DPI raster image) is suitable for large-format printing.
- Rendering and Proofing: Our design team creates a digital rendering or "effect proof." This mock-up shows exactly how the sky image will be scaled, cropped, and oriented within the ceiling's dimensions.
- Client Approval: The client or contractor must sign off on this proof before we proceed to printing. This confirmation locks in the clarity, scale, and direction, ensuring the final printed membrane matches expectations perfectly.
Skipping this step is a gamble we never advise taking. A confirmed proof is your insurance against visual defects.
H3: Selecting the Correct Aluminum Profiles
The stretch ceiling membrane is held in place by a perimeter track made of aluminum profiles. These profiles are not one-size-fits-all. The correct choice depends entirely on the installation site. Based on site photos and project plans provided by our clients, we help them select from various types:
- Wall-Mounted Profiles: Fixed directly to the walls around the room's perimeter.
- Ceiling-Mounted Profiles: Used when the frame needs to be attached to the original ceiling, often to create a "floating" effect or drop ceiling.
- Separator or Double Profiles: Used for large ceilings to join multiple membranes or to create complex, multi-level designs.
Choosing the right profile ensures a secure fit, clean edges, and a stable foundation for the entire stretch ceiling sky system.
How Is the Lighting Prepared for a Backlit Stretch Ceiling Sky?
You can have the most beautiful, high-resolution printed sky, but it can be completely ruined by poor lighting. Hotspots, dark patches, and visible shadows from the LED strips will instantly shatter the illusion of a real sky. How do you guarantee the illumination is as flawless and uniform as the image itself?
Proper lighting preparation for a backlit stretch ceiling sky is a technical task. It requires creating a custom LED layout for even light distribution, painting the ceiling base a bright white to maximize reflection, and applying aluminum foil tape inside the profiles to prevent light leaks and control shadows.
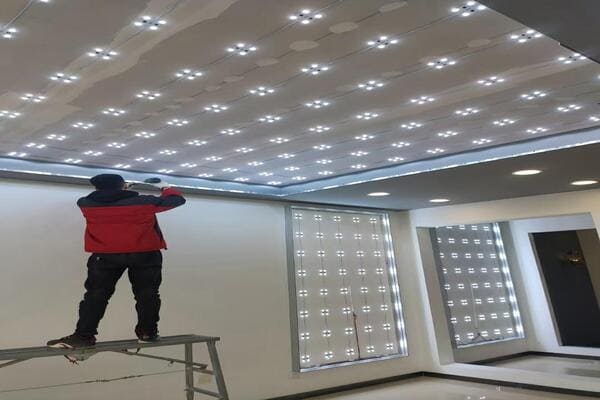
Dive Deeper: Engineering an Even Glow
A backlit sky effect depends on creating a perfect lightbox behind the translucent printed membrane. From our experience supplying these systems, we guide installers to focus on three key areas to achieve a professional, uniform glow without any imperfections.
H3: Designing a Diffuse-Reflection LED Layout
Simply sticking LED strips to the ceiling base is a common mistake that leads to visible bright lines or "striping" through the membrane5. The goal is to create soft, diffuse light.
We work with contractors to develop an LED layout plan based on the project's area and the depth of the ceiling cavity6 (the distance between the base ceiling and the stretch membrane). This plan specifies:
- LED Type: Using strips with a wide beam angle or a diffusing lens is crucial.
- Grid Spacing: The distance between each row of LEDs is calculated to ensure overlapping light cones7, eliminating dark spots. A deeper cavity allows for wider spacing, while a shallow one requires a denser grid.
- Power and Brightness: We help calculate the total lumens needed to achieve the desired brightness level, ensuring the sky looks vibrant but not overpowering.
H3: Maximizing Light Reflectivity on the Base
The surface behind the LEDs plays a huge role in the final brightness and uniformity. We always recommend two simple but highly effective preparation steps:
- Paint the Ceiling Base Bright White: Before installing the LEDs, the original ceiling and any side walls within the frame should be painted with a high-reflectivity matte white paint8. A dark or unpainted surface will absorb light9, creating a dimmer, muddier look and forcing you to use more power. A white base acts as a powerful reflector, bouncing light back through the membrane evenly.
- Apply Aluminum Foil Tape: After fixing the aluminum profiles but before installing the membrane, installers should apply reflective aluminum foil tape on the wall/ceiling surface right along the inside edge of the profile. This trick prevents light from escaping at the edges and eliminates the hard shadow line that the profile itself can cast. It directs all light forward, where it belongs.
H3: Comparing Lighting Preparation Methods
The difference between professional preparation and a rushed job is immediately obvious in the final result.
| Feature | Poor Preparation | Professional Preparation |
|---|---|---|
| Ceiling Base | Unpainted or dark color | Painted bright white |
| Light Bleed | Visible light leaking around the edges | Prevented with aluminum foil tape |
| Brightness | Uneven, with visible hotspots and shadows | Uniform, bright, and diffuse |
| LED Layout | Haphazardly placed strips | A planned grid for even light coverage |
| Final Effect | Artificial, looks like a lit-up sign | Natural, looks like a real sky |
What Are the Physical Installation Steps for the Stretch Ceiling Sky Membrane?
With all the materials selected and the site perfectly prepped, the final, high-stakes moment arrives. The printed membrane is ready. A single misstep during the tensioning process could wrinkle, tear, or misalign the image, undoing all the careful planning.
The physical installation involves securely fixing the aluminum profiles, then using a portable space heater to warm the PVC membrane, making it soft and pliable. Using specialized spatulas, installers systematically insert the welded harpoon edge into the profile track, stretching the membrane taut as it cools to create a flawless, glass-smooth surface.
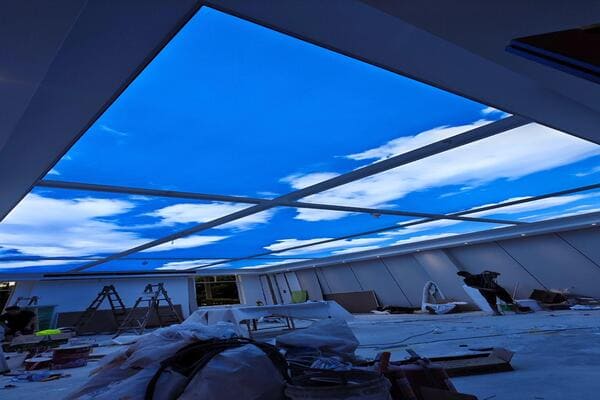
Dive Deeper: The Art and Science of Tensioning
The on-site installation of the stretch ceiling sky membrane is a process that requires skill, patience, and the right tools. While we supply the complete system, the final execution is in the hands of trained installation professionals. Here is a breakdown of the process they follow.
H3: Securing the Framework
The aluminum profile track is the skeleton of the entire system. It must be installed with absolute precision.
- Leveling: Installers use a laser level to mark a perfectly horizontal line around the room's perimeter.
- Fixing: The profiles are cut to size and screwed securely to the wall or ceiling structure. The joints at the corners must be clean and perfectly aligned. Any imperfection in the frame will be visible in the final ceiling line.
H3: The Heating and Tensioning Process
This is where the magic happens. The PVC membrane is manufactured slightly smaller than the final ceiling dimensions. Heating it allows it to stretch into place, and as it cools, it shrinks to create perfect tension10.
- Heating the Space: The installer uses a portable propane or electric space heater to warm the room and the membrane to approximately 40–50°C (104–122°F). This makes the PVC film elastic and easy to work with.
- Anchoring the Corners: After unpacking the membrane, the installer begins by clipping one corner of the harpoon into the profile track. They then move to the diagonal opposite corner and repeat, followed by the remaining two corners. This provides an initial, even hold.
- Tucking the Harpoon: Starting from the middle of each side and working towards the corners, the installer uses a specially designed spatula to hook the flexible PVC harpoon and tuck it into the profile's locking channel. This requires a firm but careful technique to avoid damaging the film.
- Cooling and Shrinking: As the membrane is fully secured in the track, the heater is turned off. The film cools down to room temperature and shrinks, pulling itself perfectly taut. This process eliminates any wrinkles or sagging, resulting in a surface as flat as a mirror.
H3: Final Checks and Adjustments
Once the installation is complete, a professional installer conducts a final quality check. They inspect the entire surface for flatness, ensure the sky image is correctly aligned, and verify that all edges are perfectly seated in the profile. One of the major advantages of the harpoon system is that the membrane can be carefully un-tucked and re-installed for adjustments or to access the space above (e.g., for LED maintenance).
Frequently Asked Questions
Can I use any image for a stretch ceiling sky?
Technically yes, but for a good result, the image must be extremely high-resolution. We recommend using vector files or raster images with a very high DPI. To prevent pixelation or blurriness, we provide clients with a digital proof showing the final scale and clarity for their approval before any printing begins.
What's the difference between 0.18mm and 0.25mm film for a printed sky?
The primary difference is thickness and feel. The 0.25mm film is a more premium option, offering a slightly better texture and a more substantial feel. The 0.18mm film is the industry standard, providing excellent visual results and cost-effectiveness. We help contractors choose based on project budget and client expectations.
Do I need special tools to install a stretch ceiling sky?
Yes, professional installation requires specialized equipment. This includes a portable space heater (gas or electric), various types of installation spatulas for tucking the harpoon, and precision tools like laser levels. As a supplier, we provide the complete membrane and profile system for these trained professionals to install.
How do you clean a printed stretch ceiling?
Cleaning is simple. The PVC material is waterproof and antistatic. For general dust, use a soft microfiber cloth. For smudges or spots, use the cloth with a gentle, non-abrasive cleaner and water. The durable, smooth surface can be easily wiped clean without damaging the printed image.
Conclusion
Ultimately, a stunning stretch ceiling sky is not the result of simply hanging a printed picture. It is the product of a complete, engineered system. A successful installation relies on a methodical process that starts with detailed pre-planning, including artwork proofing and choosing the correct membrane and profiles. It continues with meticulous lighting preparation—using a white base, a planned LED layout, and foil tape—to create a flawless, even glow. Finally, it culminates in the skilled, on-site tensioning of the membrane by a professional. By treating it as an integrated system, contractors and installers can confidently deliver the breathtaking, realistic sky effect that clients envision.
For a reliable supply of custom-printed sky membranes, complete aluminum profile systems, and the expert technical guidance needed for a flawless finish, contact Foxygen today. We are here to support your project from concept to completion.
"Ceiling - Wikipedia", https://en.wikipedia.org/wiki/Ceiling. A general reference on stretch ceilings describes them as suspended ceiling systems formed from a tensioned PVC membrane secured around a perimeter frame, supporting the article's description of a printed PVC membrane as the visible ceiling surface. Evidence role: definition; source type: encyclopedia. Supports: A neutral source should define stretch ceilings as systems using tensioned PVC or similar membranes fixed to perimeter tracks.. Scope note: This supports the general system definition rather than the specifications of any particular printed sky product. ↩
"DIY stretch ceiling trainingthe / whole process of ...",
. Technical descriptions of stretch-ceiling systems identify the harpoon edge as a welded perimeter bead that locks the membrane into an aluminum or plastic profile, supporting the article's description of the attachment method. Evidence role: definition; source type: institution. Supports: A technical or standards-oriented source should explain that some stretch ceilings use a welded harpoon or bead edge inserted into a perimeter profile.. Scope note: The citation would document the fastening principle, not verify the workmanship of a specific installation. ↩"Durability and Degradation of PVC-P Roofing Membrane ... - PMC - NIH", https://pmc.ncbi.nlm.nih.gov/articles/PMC9003350/. Studies of polymer and PVC film mechanics show that film thickness is associated with changes in tensile, tear, or puncture resistance, providing contextual support for describing a thicker ceiling film as potentially more durable. Evidence role: general_support; source type: paper. Supports: A materials-science source should support the general relationship between polymer film thickness and mechanical resistance such as tensile, tear, or puncture performance.. Scope note: This would be contextual support for material behavior and may not directly compare the exact 0.18 mm and 0.25 mm stretch-ceiling films discussed in the article. ↩
"Gathering high quality images - UITS IT Training Content Library", https://ittrainingcontent.iu.edu/training/crpos/files/uc/gathering-high-quality-images.html. Guidance on digital image resolution for print explains that enlarging raster images lowers effective pixels per inch and can produce visible pixelation, supporting the need to check artwork resolution before large-format ceiling printing. Evidence role: mechanism; source type: education. Supports: A university or technical printing resource should explain that enlarging raster images beyond their effective resolution reduces pixels per inch and can make pixel structure visible.. Scope note: The source would support the general imaging mechanism rather than prescribe a universal DPI threshold for every ceiling size and viewing distance. ↩
"How to diffuse LED tape lights for a uniform glow?", https://www.facebook.com/groups/setdesignersbuilders/posts/2383457685179119/. Lighting-design research on LED backlighting indicates that source spacing, optical diffusion, and separation distance influence luminance uniformity, supporting the article's warning that poorly spaced LED strips can appear as bright lines behind a translucent membrane. Evidence role: mechanism; source type: research. Supports: A lighting-engineering source should explain that diffuser distance, LED pitch, and beam distribution affect luminance uniformity and the visibility of bright lines or hot spots.. Scope note: The evidence would address the optical mechanism generally and may not test printed stretch-ceiling membranes specifically. ↩
"Evaluating luminance uniformity metrics using online ...", https://www.energy.gov/eere/ssl/articles/evaluating-luminance-uniformity-metrics-using-online-experiments. Research on LED backlight and light-box design shows that the separation between LEDs and the diffusing surface affects luminance uniformity, supporting the article's emphasis on ceiling-cavity depth when planning an LED layout. Evidence role: mechanism; source type: paper. Supports: A paper on LED arrays or backlit panels should show that distance from the light source to the diffuser affects overlap of light distribution and uniformity.. Scope note: The source would support the physical lighting principle rather than provide a ready-made layout formula for every stretch-ceiling installation. ↩
"LED Light Beam Angles", https://greencreative.com/lighting-academy/lighting-guide/led-light-beam-angles/. Educational lighting-design materials explain that beam angle, source spacing, and mounting distance determine how light distributions overlap on a surface, supporting the article's recommendation to space LED rows to avoid dark spots. Evidence role: mechanism; source type: education. Supports: A lighting-design educational source should explain that beam angle, spacing, and mounting distance determine illuminance overlap and uniformity.. Scope note: This supports the lighting-design principle but not a specific spacing value for the product described. ↩
"The whitest paint is here – and it's the coolest. Literally.", https://www.purdue.edu/newsroom/archive/releases/2021/Q2/the-whitest-paint-is-here-and-its-the-coolest.-literally..html. Building-lighting references describe matte white surfaces as high-reflectance diffuse reflectors, supporting the article's recommendation to use a white base to improve backlight distribution. Evidence role: mechanism; source type: education. Supports: A lighting or building-science source should state that white matte surfaces generally have high visible reflectance and scatter light diffusely.. Scope note: Actual reflectance varies by paint formulation, coating age, and surface condition. ↩
"The Physics of Light -- Color", https://www.pa.uky.edu/sciworks/light/preview/color4aa.htm. Physics and lighting references explain that darker surfaces generally have lower visible reflectance and absorb a greater fraction of incident light, supporting the article's claim that a dark base can reduce backlight brightness. Evidence role: mechanism; source type: education. Supports: A physics or lighting source should explain that dark surfaces have lower reflectance and absorb more visible light than white surfaces.. Scope note: The source would support the general optical principle, while the exact brightness loss depends on the specific surface reflectance and LED output. ↩
"White PVC Stretch Ceiling - Room Covering Kit, DIY ...", https://www.amazon.com/DIY-Stretch-Ceiling-Room-Suspended/dp/B0D9FH54TY. Materials literature on PVC films describes temperature-dependent dimensional behavior, providing contextual support for the article's explanation that a heated, stretched membrane tightens as it cools. Evidence role: mechanism; source type: paper. Supports: A materials-science or installation source should support that PVC film changes dimensions with temperature and can develop tension as it cools after being stretched.. Scope note: This is contextual material-science support and may not directly quantify the shrinkage behavior of a specific stretch-ceiling formulation. ↩